It’s unavoidable: Working with documents is a necessary part of being an attorney—which is why enhancing your skills in Microsoft Word is an important opportunity for lawyers.
When you’re working hard to meet tight deadlines, you don’t have time to painstakingly bold every title in your document or fiddle with mysterious formatting inconsistencies at the 11th hour. By streamlining your skills in Word, you can create, format, and edit your documents more efficiently—giving you more bandwidth to focus on billable work.
Here are 13 Microsoft Word features that every lawyer should know.
1. Basic shortcuts: For the essentials
When you’re dealing with creating, scanning, and managing with a high volume of legal documents, it can be surprisingly easy to overlook the basics.
As such, the first step in making Word work for you is to ensure that you’re on top of the most common shortcuts and time-savers. Start with these Word document essential skills:
- Double-click to select one word.
- Triple-click to select a paragraph.
- Use the “Find and replace” feature to change all instances of a term in a long document.
- Know keyboard shortcuts for commonly used legal symbols, such as § and ¶. The § and ¶ symbols are Option+6 and Option+7 on a Mac; on a PC, they are Alt+21 and Alt+20 (make sure you have num lock enabled, and that you’re using the numeric keyboard on the right if you have one, or this won’t work). For more, check out these cheat sheets for Mac and PC.
2. Styles: For easier formatting
Consistent formatting instantly makes any document look more professional and feel more readable—but manually reformatting headings and tinkering with fonts and spacing is frustrating, and a waste of your precious time.
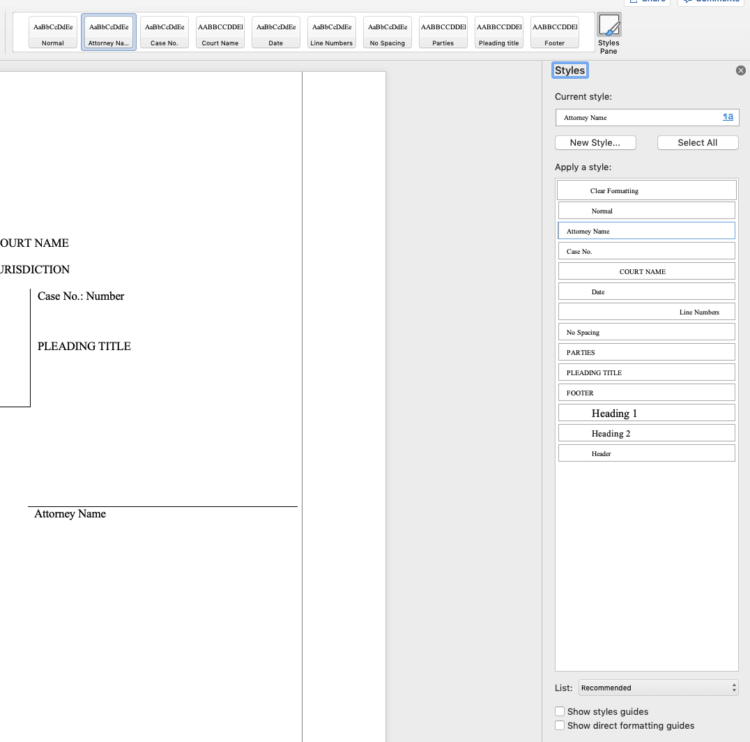
Instead, try using the Styles feature to make consistent formatting easy in Word.
Styles let you quickly apply a set of predetermined formatting selections (such as font, text size, etc.) throughout your document—instead of manually locating and changing every instance. This eliminates the risk of accidentally missing an occurrence (and thus ending up with inconsistent formatting), while also saving you the time and energy you’d otherwise lose to tedious document formatting.

With Word Styles, you can set standard formatting for everything, including:
- Body text (i.e., normal style)
- Characters
- Paragraphs
- Headings
- Tables
- Lists (including bulleted lists and numbered lists)
The Styles feature is one of the most powerful available in Word, and knowing the basics can be a big time-saver for lawyers. For an overview on how to create, modify, and customize styles, check out Microsoft’s styles basics page.
You may like these posts
3. Templates: For a starting point
Once you’ve mastered Styles, streamline your workflows even further by creating reusable templates.
Templates are exactly what they sound like: You can use them as a basis for letters, arguments, and other documents rather than starting from a blank page every time. Spend less time formatting and never send out an inconsistent-looking letter again. Here’s how to do it.
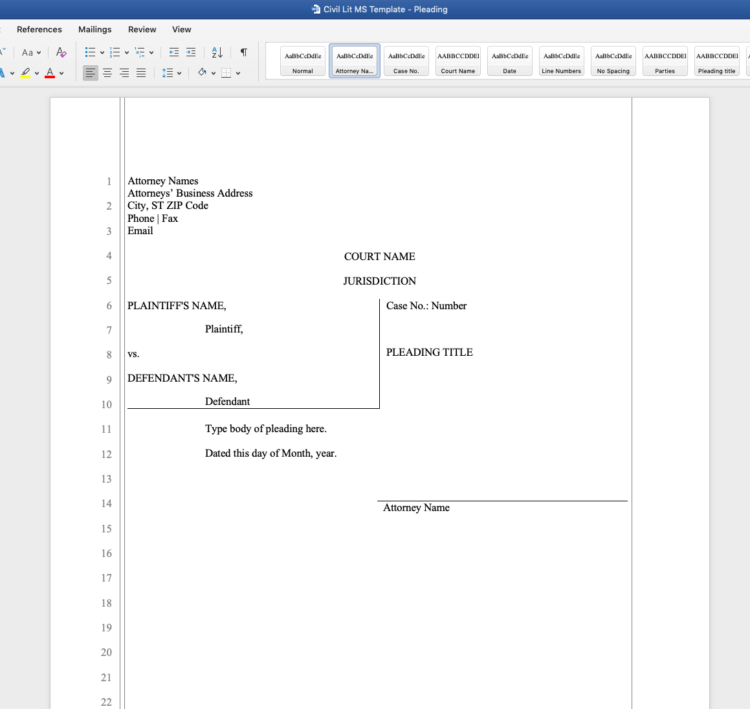
Microsoft also has an online library of templates available, so you don’t have to start from scratch. For example, here’s their civil litigation pleadings template:

Tip: You can use document management functionality in Clio Manage to quickly create documents from templates without re-entering client and contact information. Here’s how to do that.
4. Reset formatting: For a clean slate
Using templates and Styles is useful for creating a cohesively formatted document in Word, but what if your document is already a mess? As this CaseFleet post explains, it’s important to know the shortcut to resetting your formatting.
Here’s how:
- Copy all of the text of your affected document (“Command + C” on Mac or “Ctrl + C” on PC).
- Paste the copied text into a new Notepad document (“Command + V” on Mac or “Ctrl + V” on PC).
- Open a new Word document.
- Copy the text from the Notepad document.
- Paste the copied text into the new Word document.
5. Quick Parts: For commonly used text
When writing legal documents, certain pieces of text come up over and over again. Cut down on time spent copying and pasting between documents with the Quick Parts Gallery feature in Word.
Quick Parts let you create, store, and reuse pieces of content—i.e., building blocks—in a gallery that’s easy to access. Learn how to create a Quick Part here.
6. Hyperlinks: For better digital readability
If your documents are likely to be read on a computer, tablet, smartphone, or other digital device, then adding hyperlinks can instantly add context and enhance their usefulness.
The process is simple:
- Copy the URL of the hyperlink you want to add to the document.
- In your Word document, select the text you want to apply the link to.
- Add the hyperlink by pasting the URL via:
- Insert > Hyperlink, or
- right-click and select Hyperlink, or.
- “Ctrl + K” (PC) or “Command + K” (Mac).
7. The Navigation pane: For staying organized
When writing long documents, the Navigation pane in Word helps track your content and keeps you organized. Put simply, it’s a table of contents of all the headings in your document. Using it allows you to switch between sections with ease.
The best part? You can rearrange sections of your document by dragging and dropping headlines.
Enable the Navigation Pane under the “View” tab in Word.
8. The Developer tab: For custom commands
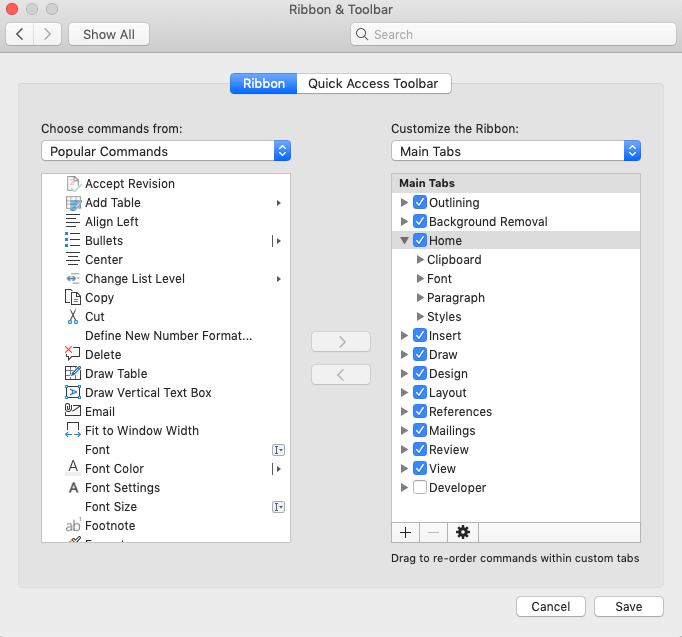
The Developer tab provides tools to help customize your experience in Word, including the ability to add text fields and checkboxes to documents. For lawyers, the Developer tab is also useful for creating electronic forms.
If you want to take your shortcuts a step further, the Developer tab also allows you to create and then ‘run’ macros—which help you accomplish a task automatically by grouping together a series of instructions into one single command.
You can enable the Developer tab under Options (Preferences on a Mac) in Word.

9. Minimize the ribbon: For a better view
It’s handy to see all of your tools in one place in Word, but sometimes, you need a bit more space to concentrate. Luckily, Word allows you to temporarily get rid of the Ribbon (the main toolbar at the top of the screen) for distraction-free writing.
- Minimize the Ribbon by pressing CTRL+F1.
- Bring it back with the same command when you need it again.
10. Restrict edits: For more control
Turning on Track Changes is the easiest way to collaborate in Word. But with multiple people throwing in their two cents, things can sometimes get out of control.
To halt edit-overload, you can restrict editing privileges to certain parts of your document using the “Restrict Editing” function.
And, should you need to make edits to a document that’s in Clio Manage, Clio Launcher makes it easy. Clio Launcher lets you open, edit, and sync new versions of documents (including Word documents) from within Clio Manage.
11. Mark as Final: For read-only status
There’s another option for keeping edits under control—use the Mark as Final function.
By marking a document as final in Word, you effectively set its status as read-only, which disables or turns off typing, editing commands, and proofing marks. While it won’t halt all edits (users can get around this restriction with some effort), the Mark as Final is still useful for clarifying your intentions to fellow collaborators.
12. The Document Inspector: For removing metadata
Stop! Don’t send out that document yet.
Since lawyers are responsible for keeping client information confidential, it’s important to ensure that all metadata is removed from their documents before sharing. As Microsoft explains, “this hidden information can reveal details about your organization or about the document itself that you might not want to share publicly.”
Use the Document Inspector to ensure your document is cleared of hidden data and personal information before sharing.
13. AutoRecover: For added backup
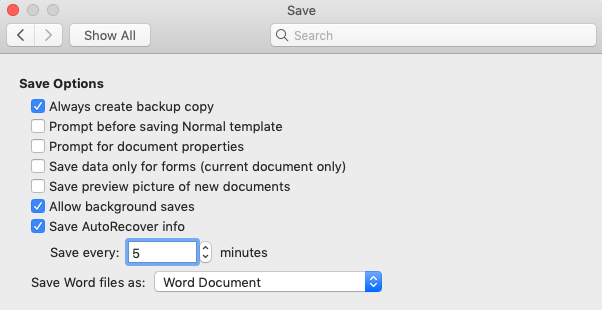
Word’s AutoRecover feature is turned on by default, but this doesn’t replace saving your documents. It’s worth beefing up your AutoRecover in your settings to ensure you’re safe from potential computer disasters.
Set the interval at which Word automatically saves things to five or 10 minutes—this way, if Word (or your computer) crashes, you only risk losing a few minutes of work. You can also guard against accidental edits by checking the “Always create backup copy” option. This creates a copy of your penultimate-saved version.

Conclusion
Documents are at the heart of your cases. By using Microsoft Word to its fullest, you can create, format, and edit your documents more efficiently—so you can better meet your deadlines and be more confident in the accuracy of your documents. The more you invest in learning new tricks to save time in Word, the more opportunities you’ll unlock to save time on routine tasks, dedicate more time to billable work, and focus on helping your clients.
We published this blog post in November 2017. Last updated: .
Categorized in: Technology
Master Productivity With MS Word and Outlook Tips for Lawyers
If mastering Microsoft Word and Outlook is a new year's resolution, be sure to watch our CLE-eligible webinar, Mastering Productivity: MS Word and Outlook Tips for Lawyers. Watch on-demand now!
Watch Now


