")
Contents: Microsoft Word for Lawyers: Master Legal Drafting & Templates
-
")
")
1. The Ultimate Microsoft Word Cheat Sheet for Paralegals
If you’re like most paralegals, you probably spend a good portion of your day wrestling with formatting legal documents in Microsoft Word. You’re not alone. According to our Legal Trends Report, 98% of billable hours are spent preparing legal documents. This can be a neverending time sink, especially when you could be working on more important, pressing tasks.
Luckily, with the right training, you can reduce your hours in Word by maximizing its functionality. If you understand its features to the fullest, you can heighten your speed, accuracy, and multitasking, making your work easier, improving client experience and service, and boosting your firm’s reputation (and yours too).
Here’s a detailed guide to mastering Microsoft Word for paralegals, including tips for preventing formatting mishaps before they happen.
Ready to speed up your document drafting? Explore how tools like Clio Draft can help.
Note: The screenshots in this article were taken from a Mac using Version 16.100.1 of Microsoft Word.
Why mastering Microsoft Word as a paralegal is essential
Microsoft Word is the standard for law firms and is used for contracts, pleadings, legal research, and document collaboration. With the right know-how, its features improve your efficiency (which can help prevent paralegal burnout) and add consistency and security to your documents.
Here are the top recommended features to master as a paralegal:
- Formatting: Margins, tabs and indentations, line and paragraph spacing, format painter, keeping lines together, widow and orphan control.
- Navigation and appearance: Font, styles, and headings.
- Lists: Bullets, numbers, and multilevel lists.
- Page: Headers and footers, page numbers, section breaks, and links.
Top 13 Microsoft Word tips for paralegals
Paralegals are often juggling lengthy contracts, pleadings, and exhibits—meaning even small formatting mistakes can lead to big headaches. By using these practical Word tips, paralegals can improve consistency, safeguard professionalism, and save valuable time.
Here are 13 useful Microsoft Words tips for paralegals:
1. Turn on hidden formatting symbols
Our eyes can’t catch everything! The hidden formatting symbols feature improves the precision and structure of your documents by showing you hidden characters like spaces, paragraph markers, or tab marks. By turning on hidden formatting symbols you’ll more easily be able to spot inconsistencies and errors in your documants formatting.
To turn on this feature, locate the pilcrow symbol to ‘Show formatting marks’.

For older versions of word, or PC users, you can use the search bar, or head to File > Options > Displace > Always show these formatting marks on the screen to ad this feature.
2. Keep words together for cleaner formatting
The Nonbreaking Hyphen symbol in word helps to prevent unnatural word breaks. For example, Word usually splits lines at spaces or hyphens. If you want two words or a hyphenated word to stay together on one line, use a nonbreaking space or nonbreaking hyphen instead.
This feature is useful to paralegals as it helps to keep the flow of the document consistent, preserves important context, and tidies aesthetics.
Go to Insert > Advanced Symbol > Special Characters > ‘Nonbreaking Hyphen’ > Insert.

3. Use non-breaking spaces and hard returns to prevent layout breaks
The Non-breaking Space sybmol, similar to the Nonbreaking Hyphen symbol above, is what will help to keep text on the same line in a document, where separating them would sacrifice readability.
For example, when text such as dates should read clearly on one line, but Word automatically split it onto two lines. To fix this, go to Insert > Advanced Symbol > Special Characters > ‘Nonbreaking space’ > Insert.
Using this symbol helps paralegals improve the clarity and context of their documents, and is often used for measurements, currency, percentages, numbers, names, and titles.
Incorrect:
Jane Doe was born on April 10,
1921.
Correct:
Jane Doe was born on
April 10, 1921.
To see all non-breaking spaces, show hidden formatting and look for the degree symbol (°). Add an intentional line break to a document by using a hard return via the Enter key.
4. Master section breaks (not just page breaks)
Adding section breaks to your Word documents helps you apply independent formatting (e.g., layout, numbering, headers, and footers) to differentiate parts of your document. This helps to improve a documents logic and reliability. This is especially important for documents that include an exhibit, table of authorities, or table of contents.
Go to Layout > Breaks to add this feature.

5. Use the Navigation Pane to quickly jump between sections
Microsoft Word’s Navigation Pane makes it easier to manage, review, and edit long legal documents with greater speed and control.
When turned on, the Navigation Pane will appear on the left hand side of the document, allowing you to quickly go between different headers, sections and pages of your document.
Go to View > Navigation Pane.

6. Insert auto-updating cross-references
Using the cross-reference feature helps you link one part of your document to another, helpful when pointing a reader from a section of text to a chart, table, or graphic elsewhere. Instead of scrolling or searching, the reader can click the link and go straight to the referenced item.
This feature becomes useful for paralegals when they are referencing the same item or information across different sections with a document.
When creating a cross-reference in Word go to Insert > Cross-Reference.
Keep in mind, in order to have something to cross refernence, it needs to already exist in the document. So add the table, graph or section first, it will then be listed in the cross-reference feature drop down to select.
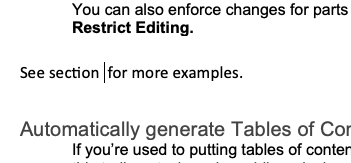
For example, if I want to link to a previous section, type in your text, for example, “See section [leave curser here to insert hyperlink] for more examples”, ensuring to leave your curser where you want the hyperlink to appear.
Then go to Insert > Cross-Reference and select the correct Heading.


The heading will then appear in the text as a hyperlink, and when clicked it will direct the reader to the correct section.

You can update a cross-reference by selecting the link and clicking Update Field, or by pressing Ctrl + A and then F9.
7. Track changes and compare documents properly
Track changes and compare documents are essential features for creating accurate documents. It gives you a clear trail of all edits. If you’ve ever received a revised document where track changes weren’t turned on, you know this is a tip for you.
During lengthy back and forths, compare documents with all the changes highlighted by going to Review > Compare > [Select Original and New Draft documents] > OK.

You can also enforce changes for parts of a document by clicking Review > Protect > Restrict Editing.

8. Automatically generate Tables of Contents and Authorities
If you’re used to putting tables of contents and authorities together by hand, here’s how to make this tedious task easier, while reducing errors and saving you time.
Insert a Table of Contents (TOC) by clicking References > Table of Contents. From there, you can choose an available Microsoft Word style. To update your TOC, click References > Update Table, which autoupdates all linked information.

Insert a Table of Authorities (TOA) by clicking References > Table of Authorities Group > Insert Table of Authorities.
You can use a custom table layout or pre-made design under Formats. Any changes to your TOA must be done in the entry field by clicking Home > Paragraph > Show/Hide and updating the content between the braces { }.

9. Use document inspection to remove metadata and hidden data
When crafting certain documents, safeguarding client confidentiality is crucial, especially in the hands of opposing counsel or the public. Microsoft Word makes it easy for paralegals to review documents for any unwanted access to sensitive information.
You can redact text using Find and Replace and replace the word with [REDACTED], or use Find and Replace to locate information you want to replace with a black box, Insert > Shapes > Rectangle.
- PC: Go to Find > Replace
- Mac: Select Search (CMD + F) > Find and Replace.
Remember to save the file as PDF and remove metadata and hidden data with the Document Inspector.
- PC: Select File > Info > Check for Issues > Inspect Document > Remove All.
- Mac: Go to Tools > Protect Document > Remove personal information from this file on save.

Remember to save the file as PDF and remove metadata and hidden data with the Document Inspector. Select File > Info > Check for Issues > Inspect Document > Remove All.
Learn more about redacting client information from a PDF.
10. Leverage version control
Version control gives you visibility into all versions of a document, allowing you to compare and contrast. To use versioning, your documents will need to be stored in OneDrive or a Sharepoint Library with AutoSave turned on.
Once the document is approved, you can lock it from edits.
- PC: Go to Review > Restrict Editing > Yes, Start Enforcing Protection. Another option is marking the document as final by selecting File > Info > Protect > Mark as Final.
- Mac: Go to Protect Document > Protection > Protect Document for (Tracked changes, Comments, Read only) > OK. You can also set up a password for the document to keep it extra secure and safe from unwanted edits and changes, or to limit access to ensure only the right eyes are able to open the document.

11. Create a clause library for commonly reused terms
By using the Quick Parts feature paralegals can easily create a clause library or for any reusable pieces of text that come up repeatedly in documents (also referred to in Word as building blocks).
- PC: To create auto text replacements go to Quick Parts > AutoText > Save Selection to AutoText Gallery.
- Mac: Insert > Text > AutoText > Insert
Paralegals often use this feature to save frequently used contract clauses (e.g., confidentiality, indemnity, governing law) as AutoText instead of retyping or hunting for boilerplate, they can insert it instantly.
Example: Typing “nda” and having it auto replace the text to “Non-Disclosure Agreement clause”
12. Avoid manual formatting (e.g., tabs, spaces, and manual line breaks)
Instead of adding tabs, spaces, or manual line breaks to control how your document looks, use Word’s built-in Styles (like Normal, Heading 1, Heading 2). Styles automatically apply consistent spacing, fonts, and formatting across your document. This makes your document easier to read, easier to update, and ensures that headings and text stay properly aligned.
If you need to adjust line breaks, use shortcuts like Shift + Enter for a manual line break — but rely on Styles whenever possible for consistency.
13. Build conditional logic
Make dynamic templates that autopopulate details like client information using conditional logic. Select the area for conditional text and click Set up the template > Conditional Section > New conditional section.
For Mac users you will find this in the Developer Tab. If you don’t see the Developer tab in the navigation ribbon, you will need to turn it on (this is the case for most Mac users). Go to Word > Preferences > Ribbon & Toolbar > Developer.
While the conditional logic feature requires several steps in Microsoft Word, it’s a lot easier to do in Clio Draft with its simple point-and-click interface for conditional text. Learn more in Clio Draft’s Guide to Document Automation Using Conditional Logic.
5 common Microsoft Word formatting mistakes to avoid
Nothing is worse than hearing that your legal documents are messy, difficult to read, and require more time to get it right. To help you avoid these missteps, here are the most common formatting mistakes you should steer clear of as a paralegal:
- Manually typing numbered lists or point headings. Use hanging indents and add styles to create automatically formatted and consistent lists.
- Using spaces instead of tabs. This creates inconsistencies because it can cause misalignment, since every letter takes up a different amount of space.
- Sending unredacted files. Use Find and Replace to remove personal information from Word documents. Remember to also wipe any metadata.
- Messing up pagination. Avoid unexpected blank pages or widow and orphan lines with Styles and Sections, rather than hard returns. Learn more about control pagination.
- Overwriting Table of Contents. Properly update your Table of Contents by using Update Field and Update Entire Table so all corresponding headings are refreshed.
Tools that make Microsoft Word better for legal work
The right Microsoft Word tools can save you time by automating repetitive legal tasks. They can even contribute to revenue generation, according to our Legal Trends Report. Here are the essential ones to enhance your productivity.
- Clio Draft: Integrates with Microsoft Word to create templates within minutes, cutting your legal drafting time by 80%.
- WordRake: Made for Microsoft Word and Outlook, this proofreading and editing software uses over 50K editing algorithms to improve your paralegal writing and communication.
- PerfectIt: An add-on that checks the consistency and quality of your legal documents with an eye on style and citations.
Looking for more ways to enhance your legal drafting? Explore Clio’s integrations with Microsoft Word.
How can paralegals improve their Microsoft Word skills?
As a paralegal, you can boost your Word skills by identifying its common uses at your firm, learning Microsoft Word hacks to better understand its features, and practicing regularly. You may consider taking courses or certifications.
Resources for continuous learning
For more information on Microsoft Word for legal professionals, check out these free Clio resources:
- Top 13 Microsoft Word Tips for Lawyers
- 6 Tips to Building Better Legal Documents in MS Word
- 20+ MS Word Drafting Tips & Tools Your Firm Should Know About [on demand webinar]
- Mastering Microsoft Word: Time-Saving Tips for Legal Professionals [upcoming webinar, September 24, 2025]
Making the most out of your valuable time
As a paralegal, your mastery of Microsoft Word is the key to your efficiency. Your day comes with shifting responsibilities and priorities, and it’s important to know when you’ll be able to focus on more important tasks. With the right skills and legal document automation tools, you can simplify your legal drafting and build a workflow that optimizes your hours, so you can prioritize the clients and cases that matter most.
Get your time back. Work smarter and format faster in Microsoft Word with Clio Draft.
Check out Clio DraftMS Word for paralegals FAQs
Do paralegals need or use Excel?
Yes, Excel is essential for paralegals for case details, such as exhibit numbers, client management, billing and finances, calculations, and report generation.
Do law firms use Microsoft Word?
Yes, Microsoft Word is used by the majority of law firms for legal document management, which highlights the importance of understanding its full functionality so you’re capitalizing on its features to boost your efficiency.
What are the best Microsoft Word features for legal professionals?
The top Microsoft Word features for legal professionals are: Quick Parts, Styles, Track Changes, Table of Contents and Table of Authorities Auto Creation, and Document Inspector.
What are the differences between Microsoft Word and Google Docs for legal work?
The majority of lawyers favor Microsoft Word because of its integrated legal formatting features and its advanced security. Google Docs is a viable alternative that’s accessible and cost-effective, but has fewer formatting features and lower level of general data security than Word.