
Contents: Microsoft Word for Lawyers: Master Legal Drafting & Templates
-


27. Hidden Formatting in Legal Documents: How to Find and Remove It in Word

Your legal brief looks clean: correct fonts, correct spacing, and correct styles showing in the gallery. But something is wrong. A heading won’t appear in the Table of Contents, a paragraph keeps reverting to a different size when you press Return, and text pasted from opposing counsel’s document ignores every style you try to apply. The obvious fixes don’t work because the problem isn’t visible.
“Hidden formatting” in Word isn’t one thing. It’s four distinct problems, each requiring a different diagnostic and a different fix. This article covers them in the order you’re most likely to encounter them, with the correct tool for each.
For deeper training on legal document formatting and Word workflows, join our Mastering MS Word webinar series.
The four types of hidden formatting in Word legal documents
Before reaching for any cleanup tool, identify which type of hidden formatting you’re dealing with. The wrong tool applied to the wrong type will either do nothing or create new problems.
Type 1: Invisible characters
Invisible characters are non-printing marks that affect layout without being visible in normal view:
- Paragraph marks
- Manual line breaks
- Non-breaking spaces
- Tab characters
- Section breaks
- Page breaks
- Underlined spaces and underline characters (the blanks in published court forms)
These are the most common cause of unexpected spacing and indentation in legal documents. They become visible through the Show/Hide paragraph button but require specific deletion or replacement to fix.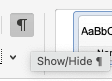
Type 2: Direct formatting overrides
Direct formatting overrides are manual formatting changes applied on top of a style (bold, font size, character spacing, and indent adjustments). The text looks correctly formatted, but an invisible override sits between the style and what Word renders on the page.
These break style-dependent features like TOC generation, automatic numbering, and global style changes. The document looks right; it behaves wrong. This is the most consequential type for legal drafting workflows.
Type 3: Hidden text
This is text formatted with the Hidden attribute that doesn’t display or print in normal view. In legal documents, this appears in template instructional notes, in received documents where content was concealed rather than deleted, and in older templates that used hidden fields for variable data. It’s invisible unless you know how to surface it.
Type 4: Tracked formatting changes
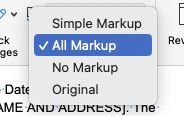
When Track Changes is active, Word records not just content edits but formatting changes (style applications, spacing adjustments, and direct formatting). These accumulate in documents exchanged between firms and cause unpredictable behavior, particularly when markup display is set to Simple Markup or No Markup, making the changes invisible during review.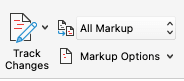
Before fixing any of these, you need to see what you’re dealing with. Two tools make that possible.
How to diagnose hidden formatting before you try to fix anything
Most articles on this topic jump directly to cleanup actions. That’s the wrong order. Using the wrong tool on the wrong type of hidden formatting either does nothing or creates a new problem, most commonly applying Clear All Formatting when what the document actually needs is a targeted override removal.
Diagnose first. Two tools give you an accurate picture of what Word is actually doing to the selected text.
Reveal Formatting pane
Windows: Press Shift+F1 anywhere in a problem paragraph.
Mac: View > Reveal Formatting.
A pane opens showing every formatting property applied to the selected text: font name and size, character spacing, paragraph spacing and indentation, style assignment, and section properties. Each property is a clickable link that opens the relevant dialog for editing.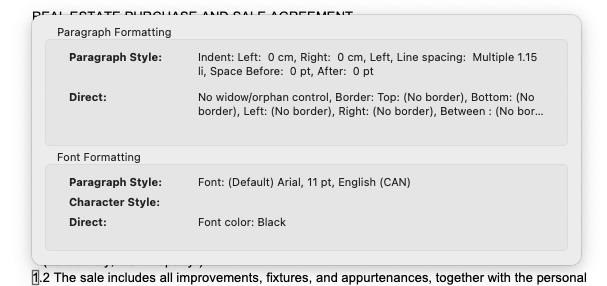
This is the most comprehensive formatting diagnostic in Word. It shows the complete formatting stack, including properties that have no visual indication in the document.
A practical example: a body paragraph in a brief that looks correctly formatted but has character spacing set to “Expanded 1pt.” Invisible to the eye, but it causes line length inconsistency across pages that no amount of margin adjustment will fix. Shift+F1 surfaces it immediately.
The gap between what your document looks like and what Reveal Formatting shows you is the hidden formatting problem.
Style Inspector
Windows: Home > Styles panel launcher > Style Inspector button.
Mac: Home > Styles section in the ribbon.
The Style Inspector shows two things the Reveal Formatting pane doesn’t separate clearly: the paragraph style assignment versus any direct formatting overrides on top of it, and the character style versus character-level overrides. Each layer has its own Clear button that removes overrides without touching the underlying style.
This is the right tool for removing hidden formatting from legal documents because it’s precise and non-destructive.
![]()
Clear All Formatting (the eraser icon on the Home tab), on the other hand, removes everything, including the style assignment, and resets the paragraph to Normal style. In a legal document where heading styles drive TOC entries and paragraph styles drive automatic numbering, that’s destructive. Don’t use it for hidden formatting cleanup in legal documents. Use the Style Inspector’s Clear buttons instead.
Finding and removing invisible characters in legal documents
Invisible characters are the most common source of spacing and indentation problems in legal documents, and the easiest type of hidden formatting to find once you know how to look.
Making invisible characters visible
Press Ctrl+Shift+8 (Mac: ⌘8), or click the paragraph button (¶) on the Home tab. This toggles Show/Hide formatting marks and reveals every non-printing character in the document.
Tip: Before doing any document automation work, whether you’re working natively in Word or through a connected tool like Clio Draft, turn on invisible characters. Paragraph marks, tab characters, non-breaking spaces, and section breaks are all invisible by default, and you can’t reliably automate what you can’t see.
Microsoft Word hidden formatting symbols: a legal reference
The most common non-printing characters you’ll encounter in legal documents include:
| 
Paragraph mark Carries the paragraph’s formatting. Deleting it merges the paragraph with the one below and inherits that paragraph’s formatting. This is the most common cause of unexpected style changes when editing. |
| ↵
Manual line break Breaks the line without starting a new paragraph. Often inserted accidentally instead of a true paragraph break, causing spacing that doesn’t respond to paragraph style adjustments. Press Shift+Enter (Windows) or Shift+Return (Mac). |
| ·
Non-breaking space Prevents a line break between two words. Commonly imported from PDF conversions, court database results, and web-based legal research platforms. Press Ctrl+Shift+Space (Windows) or ⌥Space (Mac). |
| →
Tab character Frequently imported from external documents and PDFs. Conflicts with the paragraph-level tab stops built into legal templates. |
| ···
Section break Controls page numbering, header and footer behavior, and column formatting. Deleting one accidentally collapses carefully configured page numbering across sections. Insert via Insert > Break > Section Break type (Windows) or Layout > Breaks > Section Break type (Mac). |
| A
Dotted underline Indicates hidden text. Format > Font > Hidden (Windows) / Format > Font > Hidden (Mac). |
Removing invisible characters at scale
For a single document with a handful of stray characters, manual deletion works. For a 200-page contract from a PDF conversion with non-breaking spaces throughout, it doesn’t. PDF conversions tend to introduce text boxes, column breaks, and drawn objects that are not needed in a Word template and are difficult to work with in document automation tools.
Use Find & Replace: Ctrl+H > More > Special. The Special menu lists every non-printing character type with its corresponding search code.
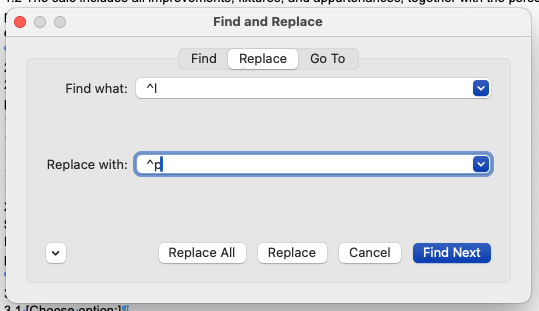
To normalize a brief received from a PDF conversion that uses manual line breaks throughout instead of paragraph marks:
Windows:
- Ctrl+H > More > Special.
- In the Find field, select Manual Line Break (^l).
- In the Replace field, select Paragraph Mark (^p).
- Click Replace All.
Mac:
- Edit > Find > Advanced Find and Replace > Replace tab.
- Click More, then click Special.
- In the Find field, select Manual Line Break (^l).
- In the Replace field, select Paragraph Mark (^p).
- Click Replace All.
Run the replacement until the count returns zero. The document’s paragraph structure is now consistent with the template’s paragraph styles.
Removing direct formatting overrides without breaking your legal document
Direct formatting overrides cause the most damage in legal documents and are the least visible. The text looks right. The styles appear correct in the gallery. But global style changes don’t apply, TOC entries go missing, and numbering behaves inconsistently. The overrides sit between the style definition and the rendered output.
How overrides accumulate in legal drafting
Every manual formatting action in Word (clicking Bold, dragging an indent marker, adjusting font size through the ribbon) creates a direct formatting override on top of the paragraph or character style. These accumulate through:
- Manual formatting by junior associates or paralegals who format by appearance rather than by style.
- Formatting imported from PDFs, opposing counsel’s documents, or court database results.
- Incremental adjustments made during review rounds that each seem minor but compound across a long document.
The correct removal method
Use the Style Inspector’s Clear buttons (covered in the diagnostic section above):
- Clear Paragraph Formatting removes paragraph-level overrides: spacing, indentation, and alignment. The paragraph style stays intact.
- Clear Character Formatting removes character-level overrides: bold, font size, and character spacing. The character style stays intact.
The document structure (TOC entries, heading hierarchy, and automatic numbering) is unaffected.
For targeted removal on selected paragraphs, without opening the Style Inspector:
- Remove paragraph-level overrides from selected text:
- Windows: Ctrl+Q.
- Mac: select the text, open the Style Inspector, and click Clear Paragraph Formatting.
- Remove character-level overrides from selected text:
- Windows: Ctrl+Spacebar.
- Mac: select the text, go to Home tab > Font group, and click the Clear All Formatting button (the A with an eraser).
Both produce the same result as the Style Inspector’s Clear buttons: overrides removed, style preserved.
Removing a specific override document-wide
For a brief where every body paragraph has been manually set to 12pt even though the Body Text style already specifies 12pt (creating a redundant override that blocks global style changes from taking effect), Find & Replace removes it across the entire document at once:
Windows:
- Ctrl+H > More > Format > Font.
- Set the font size to 12pt in the Find field.
- Leave the Replace field empty. Click in it, then click Format > Font and set no specific size (clear any size value).
- Click Replace All.
Mac:
- Edit > Find > Advanced Find and Replace > Replace tab > More > Format > Font.
- Set the font size to 12pt in the Find field.
- Leave the Replace field empty. Click in it, then click Format > Font and set no specific size (clear any size value).
- Click Replace All.
The override is cleared document-wide. The Body Text style now controls the size as intended.
Revealing and removing hidden text in legal documents
Hidden text (formatted with the Hidden attribute rather than deleted) is the type of invisible formatting with the most direct professional responsibility implications.
Where hidden text appears in legal documents
Three common sources:
- Template instructional text. Template authors sometimes hide instructional notes within the template itself, providing guidance on how to use a particular section. Functional when the template is distributed correctly; problematic when it appears in a filed document.
- Received documents with concealed content. Some drafters use the Hidden attribute to “delete” content informally rather than removing it entirely. Documents received from opposing counsel or co-counsel may carry content that isn’t visible in Print Layout view.
- Legacy template systems. Older firm templates sometimes used hidden text fields for variable data entry. That content may still be present in documents generated from those templates.
How to reveal and find hidden text
Enable Show/Hide (Windows: Ctrl+Shift+8, Mac: ⌘8). Hidden text appears with a dotted underline. To make it visible permanently regardless of the Show/Hide state, go to File > Options > Display > check Hidden text under Always show these formatting marks.
Mac: Word > Preferences > View > under Show Non-Printing Characters, check Hidden text.

To find all hidden text in a document, including text that isn’t visible even with Show/Hide enabled:
Windows:
- Ctrl+F (or Ctrl+H) > More > Format > Font.
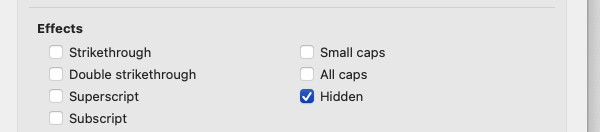
- Check the Hidden checkbox > OK.
- Click Find All to select every instance simultaneously.
Mac:
- Edit > Find > Advanced Find and Replace > More > Format > Font.
- Check the Hidden checkbox > OK.
- Click Find All to select every instance simultaneously.
How to remove hidden text
With hidden text selected, either delete it entirely or remove the Hidden attribute: Select the text > Home tab > Font dialog launcher > uncheck Hidden > OK. The text becomes visible and printable.
Before forwarding any legal document externally (to opposing counsel, a court, or a client), confirm that hidden text has been reviewed and either removed or intentionally retained. Document Inspector (File > Info > Check for Issues > Inspect Document) will flag hidden text as part of its metadata audit.
Mac doesn’t have a Document Inspector. To remove personal information, go to Tools > Protect Document and check the box to remove personal information from the file on save. For hidden text specifically, use ⌘8 to enable Show/Hide, review all dotted-underlined text manually, and delete anything that should not be shared.
Tracking and removing tracked formatting changes
Tracked formatting changes are the type of hidden formatting most commonly overlooked in legal practice, and one of the most reliable sources of unexpected document behavior after collaboration.
What tracked formatting changes are
When Track Changes is active, Word records formatting changes (style applications, spacing adjustments, and direct formatting) alongside content edits. These formatting changes must be accepted or rejected the same way content changes are. Most attorneys review content tracked changes and accept all; the formatting tracked changes stay pending in the file, where they affect document behavior without being visible.
Why they cause problems
A document with unresolved tracked formatting changes may render differently depending on whether markup is shown or hidden. Printed output may not match the screen. Accepting all content changes while leaving formatting changes pending creates orphaned markup that influences style behavior in ways that are difficult to trace.
How to see and resolve tracked formatting changes
- Review tab > Show Markup > check “Formatting.” Tracked formatting changes become visible in the markup.
- To resolve them: Review tab > Accept > Accept All Changes, or use the Reviewing Pane to review individually.
To prevent tracked formatting changes from accumulating during cleanup sessions where you’re intentionally reformatting a received document:
- Review tab > Track Changes dropdown > Change Tracking Options.
- Uncheck “Track formatting.”
Content changes will still be tracked; formatting changes will not. This is the right setting when normalizing a received document to your firm’s template standards.
Mac users will need to protect the document to avoid additional unwanted changes.
For documents received from opposing counsel, resolve tracked formatting changes before beginning any style normalization. Tracked formatting changes should be the first cleanup step, not the last. See our article on how to clean up a Word document received from opposing counsel for the full cleanup sequence.
Where hidden formatting comes from in legal workflows, and how to prevent it
Every type of hidden formatting has a source. Fixing it document by document is a maintenance task. Addressing the source is a workflow fix.
Paste behavior. Pasting from PDF conversions, court database results, web browsers, or another firm’s document imports invisible characters, direct formatting overrides, and sometimes entire style definitions. The single most effective prevention: Use Paste Special > Keep Text Only as the default for content pasted from outside the firm’s documents. Configure it permanently at File > Options > Advanced > Cut, Copy, and Paste > Pasting from other programs > Keep Text Only.
For more on how PDF conversions specifically break legal document formatting, see our article on how to convert PDF legal documents to Word.
Template inheritance. A template that contains direct formatting overrides, hidden text, or misconfigured styles passes those problems to every document generated from it. Before distributing any template firm-wide, run a full diagnostic using Reveal Formatting and the Style Inspector across each paragraph type. Fix problems at the template level, not per document.
See our article on why Microsoft Word styles break in legal documents for how to audit and rebuild a template’s style architecture.
Incremental manual formatting. Direct formatting overrides accumulate through normal drafting behavior: a font adjustment here, a spacing fix there. The long-term fix isn’t correcting individual documents. It’s a template with style-based formatting thorough enough that manual formatting becomes unnecessary, combined with formatting restrictions that make the correct approach the only easy one.
Master Microsoft Word for Legal Drafting
This is just one piece of the puzzle. Explore the Master Microsoft Word for legal drafting hub for all our Word resources for legal professionals.
MS Word Hub
Clio Draft removes the hidden formatting problem at the source
Learning to find and remove hidden formatting makes you better at cleaning up Word documents. The real payoff, though, is building clean templates in Clio Draft so there’s nothing to fix in the first place.
Clio Draft generates documents from controlled, automation-driven templates. Documents can start clean, without the paste-in history, incremental overrides, and style drift that accumulate in manually assembled Word files. The hidden formatting problems this article covers are almost always the result of how a document was built or received, not a property of Word itself. Document automation removes the most common build-time sources before the first attorney opens the file.
If hidden formatting cleanup has become a routine per-matter task, the drafting workflow needs to change, not just the cleanup technique. Fix the source template first, as any document generated from it inherits whatever is already there, clean or not. By building clean templates in Clio Draft, every document generated from it firm-wide starts from the same foundation.
The right fix starts with the right diagnosis
Hidden formatting in Word is four distinct problems, and the right tool depends on which one you’re dealing with. Diagnosing before cleaning is the step most people skip, and it’s the step that determines whether the fix works or creates a new one.
Reveal Formatting and Style Inspector give you an accurate picture of what Word is actually doing to your document. Not what it looks like, but what it is. Used together, they make every type of hidden formatting findable and fixable without the collateral damage that Clear All Formatting causes in style-dependent legal documents.
For firms that want documents to originate clean rather than require cleanup per matter, Clio Draft is the next step: document automation that builds in correct formatting from the start, so the diagnostic work in this article becomes the exception rather than the routine.
Hidden Formatting in Legal Word Documents FAQs
How do I see hidden formatting in Word?
Windows: Shift+F1 opens the Reveal Formatting pane. Mac: View > Reveal Formatting.
Both show every formatting property applied to the selected text: font, spacing, indentation, style assignment, and section properties.
To reveal invisible characters: Windows: Ctrl+Shift+8, Mac: ⌘8 (or the paragraph button on the Home tab on either platform). This shows paragraph marks, line breaks, tabs, non-breaking spaces, and section breaks. For hidden text specifically, Show/Hide makes it visible with a dotted underline.
The Style Inspector (Home > Styles panel launcher > Style Inspector button) shows style assignments and direct overrides in two clearly separated layers.
How do I remove hidden formatting in Word without losing my styles?
Don’t use Clear All Formatting. It resets the paragraph to Normal style, which breaks heading hierarchy and TOC generation in legal documents.
Use the Style Inspector’s Clear buttons to remove paragraph or character overrides while keeping the style assignment intact. For selected text:
- Remove paragraph-level overrides — Windows: Ctrl+Q. Mac: select the text, open the Style Inspector, and click Clear Paragraph Formatting.
- Remove character-level overrides — Windows: Ctrl+Spacebar. Mac: select the text, go to Home > Font group, and click the Clear All Formatting button (the A with an eraser).
Both preserve the underlying style.
How do I show all hidden formatting symbols in Word?
Windows: Ctrl+Shift+8, Mac: ⌘8, or the paragraph button on the Home tab on either platform. This reveals all non-printing characters: paragraph marks, manual line breaks, tabs, non-breaking spaces, section breaks, and hidden text with a dotted underline.
To make specific marks permanently visible regardless of the Show/Hide state:
- Windows: File > Options > Display, check the individual formatting marks you want to always show.
- Mac: Word > Preferences > View > Show Non-Printing Characters.
What is the Microsoft Word hidden formatting symbols list?
The non-printing characters you’ll most commonly encounter: the paragraph mark carries paragraph formatting; the manual line break (Shift+Enter / Shift+Return on Mac) breaks lines without starting a new paragraph; a raised dot is a non-breaking space; an arrow is a tab character; a dotted underline indicates hidden text; a double dotted line with a label is a section break. The section on invisible characters in this article covers what each one does in legal documents and how to remove it.
Why does my legal document look right but keep breaking?
The most likely cause is direct formatting overrides sitting on top of styles. The document looks correct because the override matches the style visually, but it blocks the style from functioning. TOC entries stop updating, numbering behaves unexpectedly, and global style changes don’t apply. Diagnose with Shift+F1 (Windows) or Format > Reveal Formatting (Mac) to see whether overrides are present, then use the Style Inspector’s Clear buttons to remove them while keeping the style assignment intact.
How do I find hidden text in a Word document?
Windows: Ctrl+F > More > Format > Font > check Hidden. Mac: Edit > Find > Advanced Find and Replace > More > Format > Font > check Hidden.
Click Find All to select all instances simultaneously. Delete or remove the Hidden attribute as needed.
Before forwarding any legal document externally, check for hidden text first. Windows: Document Inspector (File > Info > Check for Issues > Inspect Document) will flag it as part of its metadata review. Mac does not have a Document Inspector. Use ⌘8 to enable Show/Hide, review all dotted-underlined text manually, and delete anything that should not be shared.
Master Microsoft Word for Legal Drafting
This is just one piece of the puzzle. Explore the Master Microsoft Word for legal drafting hub for all our Word resources for legal professionals.
MS Word Hub